Retina Screenshots with Firefox
When developing prototypes, you might need to send screenshots of web dev work you’re doing to a client, or demonstrating a bug or feature.
By the end of this, you should be able to get a screenshot of a web page at any ratio with decent pixel density, using Firefox Screenshots. Don’t worry, you don’t need a retina display to make it work.
Firefox Screenshots is a relatively new feature in Firefox, which lets you take screenshots of web pages and lets you copy, save or share your screenshots online. It was originally developed as a user experiment under Mozilla’s Test Pilot Program, but has since been implemented into the browser. Mozilla has a bit more information on their wiki.
Just note that because this is software being run in the browser, you can’t use it to get high density screenshots of other software running on your system.
Getting a Screenshot
First, you should review the Mozilla Cloud Services Terms to make sure that the terms are fair for you, as Firefox Screenshots does send data back.
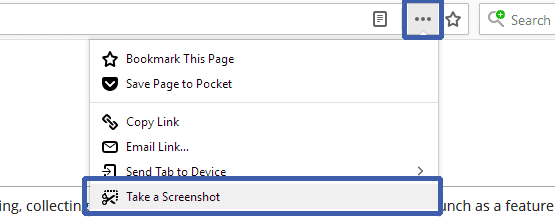
Assuming that you are in agreement, you can quickly grab a screenshot, either though the address bar menu, or by right clicking, and choosing ’Take a Screenshot’:
Then you can select the area of the screenshot. Some options available:
- Save Full Page: basically like stitched screenshots, from the top to the bottom. Good if you’re looking to get the whole design down
- Save Visible: Grabs what your display can see right at that moment.
- An element: As you hover around the page, you’ll see rectangles highlighted. Click the mouse and you’ll get a perfect rectangle around the desired element!
- An arbitary rectangle: Click and drag the mouse to grab the thing you’re after.
Then you can choose to copy to the clipboard, save it, or upload it to Firefox Cloud.
Now For The Magic
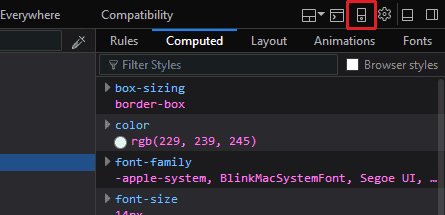
At the moment, you’re currently getting screenshots in the monitor’s native display density, but what you’re really after is getting those crisp screenshots. So what you need to do is to toggle the the Developer Tools (Ctrl + Shift + I), and click this little icon, which toggles Responsive Design Mode:
Right away, you’ll see the web page squeeze into a small space—representing the responsive viewport. You can adjust the resolution here, but more interesting is the Device Pixel Ratio (or DPR) list box, which you can set to 1, 2, or 3. This setting is what we want, and it’ll get us those large images!
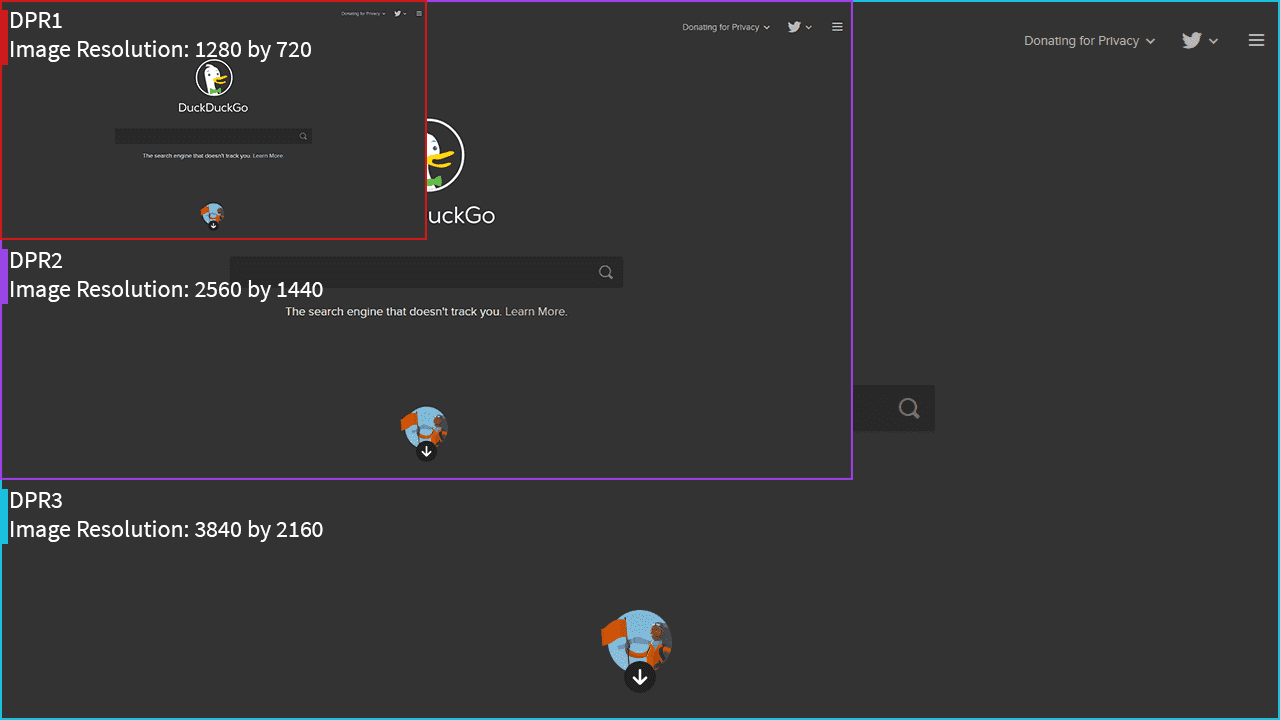
These images are rather large for demonstrating, but here’s a scaled down version with some useful labels:
As you can see, for each ratio the image gets proportionally larger, which means there’s far more detail visible!
Other Solutions
There aren’t many solutions out there that deal with taking screenshots in the way that I’ve shown you here. There is gtk-vector-screenshot, which works with GTK 3 applications, but it hasn’t seen a major release since 2014 (at least as of writing this).
If there’s any other solutions that you’ve found or made yourself, contact me and I’ll see about adding it to this list!


